Chili

Well, it’s another beautiful fall day in North Carolina.

Ugh. Where did summer go again? Please, someone, tell it that I will give up all the pumpkin spice lattes in the world for summer to come back. Also, I love the view from my apartment. I really do.

In my mind days like this, which for me encompass pretty much the entirety of fall, winter and spring (blech), call for something hearty but not starchy. Something that warms the cockles of my heart, and that makes me think maybe, just maybe, this weather change won’t be too bad. This food for me is chili.

Mmmm, chili. Even though the name reminds me of the weather outside it still makes me happy.

I nabbed this recipe a long time ago from Allrecipes and it is titled “Debdoozie’s Blue Ribbon Chili.” I don’t know who Debdoozie is, but I would like to meet her and shake that woman’s hand. And give her a hug. Maybe ask what series of life choices led to the creation of this chili, because whatever they were I want to make them, too. Too much? Just try the recipe and tell me if that’s too much. (Probably.)

Ok then, let’s get started!

First, the ingredients. I had LSB go shopping for some of the ingredients, which he very kindly did, so they may look a little wonky. Boys do not understand portions. It is something in my lifetime I have come to accept.

Two pounds of ground beef (which LSB discovered comes in a tube, but it was still 93/7 so I accepted this fact), one 15-ounce can of dark red kidney beans, one 15-ounce can of light red kidney beans, 2.5 cups of tomato sauce (LSB bought three 15-ounce cans, when you only need 1.5ish of those, but usually what I do is buy 1 of that next size up of tomato sauce if you want my advice), 8 oz. of salsa (1/2 of the jar pictured), 1 onion (LSB bought a red onion, but I would have bought a yellow one), and 1 packet of chili seasoning.

Now, when I go, I either choose hot chili seasoning or hot salsa, but of course it’s up to your discretion and taste buds. If I were cooking for my mom I would probably not do that, though.

Start by chopping up 1/2 of the onion.

Then preheat your large sauce pan on medium heat and throw the onion and ground beef in, stirring around until the ground beef is browned.

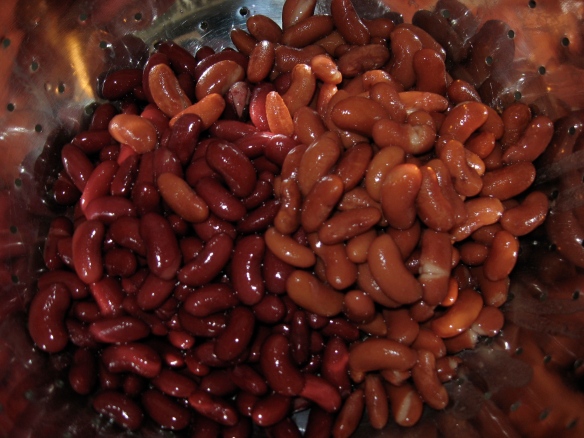
While that’s browning and you’re stirring it around for a bit, put a strainer over your sink and dump the dark and light red kidney beans in and let them drain.

Um, yum. I don’t know why, but I think that beyond being the magical fruit, beans are just absolutely delicious.

And yes, I’m still 7 years old sometimes.

But we knew that already.

Moving on.

Now it’s been a few minutes and the beef is browned, you’ve taken away some of the fat if that’s your thing, and you’re ready to dump the rest of the ingredients in.

Seriously, it’s all downhill from here.

First, lots of black pepper.

Then, the tomato sauce. Like I said you can measure out 2.5 cups or just add about 1.5 15-ounce cans of tomato sauce, or one big can of tomato sauce (which the exact ounces in that eludes me at the moment).

Mix that all around and then add the chili seasoning packet. The recipe says 4 tablespoons or some measured nonsense like that, but if you’re using 2 pounds of ground beef, be daring and just go for the whole packet! Life is too short to measure out 4 tablespoons of chili powder!

Of course, if you like, you can always make your own chili seasoning with cayenne, and garlic something or other, and whatever other spices you want that would taste good. But for me, whatever. Chili is delicious and amazing with the packet, and so if it ain’t broke…I’m not fixin’ it.

And talk about not fixing something that’s broke, here’s my favorite addition to this chili recipe. 8 ounces of salsa. Y.u.m.m.o.
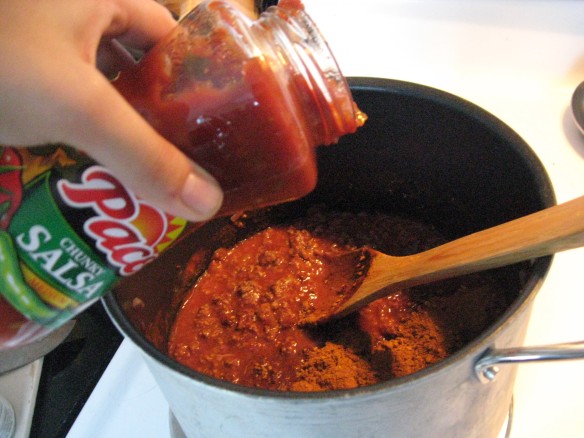
Now throw in some garlic salt…(sometimes when I’m out or I forget that I have garlic salt I put in garlic powder and a wee bit of salt)…

And then finally the thing that makes chili chili…the beans!

Stir this all together really well, see if you need anything else (I actually added a few dashes of cayenne pepper to this due to the lack of heated other ingredients this time), and then turn down the heat on this concoction to low, and go away for an hour.

Stir it if you want every so often, but don’t feel too obligated.

Let me tell you this straight: the longer this dish simmers, the better. it. gets. You must leave at least one hour for this to be at awesome, and longer equals closer and closer to chili nirvana.

The must is more of a suggestion, of course.

But seriously, let it simmer and leave it alone.

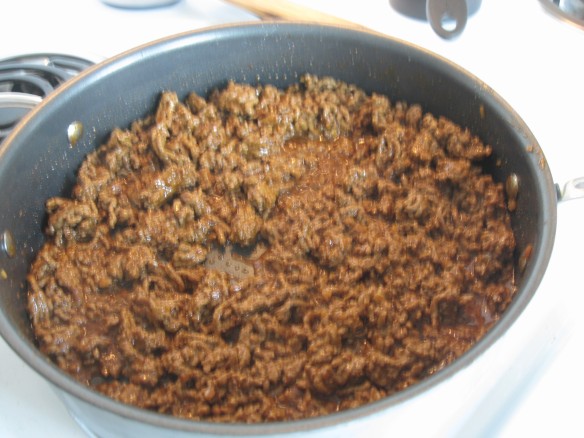
Here’s what it looks like after it’s been sitting and concocting and plotting to be the most delicious chili you’ve ever eaten.

Try not to eat the whole thing at once and remember this is HOT (as in lava hot) when it comes out of the pot. But if you’re like me you will never remember this and try to eat it as soon as it’s dumped into a bowl. There are many things I have learned to accept about myself, and this is one of them.

Ok, so, finally, here’s the recipe from Allrecipes again (my comments in italics). Enjoy!! Let me know how it goes!

Ingredients

  • 2 pounds ground beef
  • 1/2 onion, chopped
  • 1 teaspoon ground black pepper
  • 1/2 teaspoon garlic salt
  • 2 1/2 cups tomato sauce (One large can of tomato sauce will be perfect, or just do 1.5 cans of 15-ounce cans)
  • 1 (8 ounce) jar salsa
  • 4 tablespoons chili seasoning mix (Just use one packet. It’s fine.)
  • 1 (15 ounce) can light red kidney beans
  • 1 (15 ounce) can dark red kidney beans

Directions

  1. In a large saucepan over medium heat, combine the ground beef and the onion and saute for 10 minutes, or until meat is browned and onion is tender. Drain grease, if desired.
  2. Add the ground black pepper, garlic salt, tomato sauce, salsa, chili seasoning mix and kidney beans. Mix well, reduce heat to low and simmer for at least an hour.

Mexican Casserole

Have you ever longed for a recipe that:

  • Is delicious?
  • Is a universal pleaser?
  • Makes tons of leftovers?
  • Makes delicious leftovers?
  • Is ridiculously easy?

You have? Well, ok then, friends, step this way and allow me to introduce you to Mexican Casserole!

This is another AllRecipes find from a long time ago, but really, it’s just plain old good. It’s great on weeknights because the ingredients in it can stand to be around a long time and it’s cheap, too. Plus it makes you get over that case of the Wednesdays. At least it did for me.

So here we go! The cast of characters: tortilla chips, broken up, enough to line the bottom of a 9×13″ pan, ground beef (I use 93/7 because I tried it with turkey once and it just….it just….it just wasn’t the same), Rotel (this is in lieu of the tomato in the recipe, I’ll explain later), chili beans, sour cream (I use light), and green onions. Which I forgot to photograph.

It happens.


Everyone say hi to my cat Madison in the background!

First, preheat a pan over medium-to-medium-high heat and brown the pound of ground beef.

Mmmmm, beef.

After a few minutes the ground beef will be browned and the world will be yours to conquer. Well maybe not, but you know what I mean. Moving on. Now, even though the recipe doesn’t call for it, I like to add in some taco seasoning to give the recipe a little…oomph. You can surely go without it, but it does add something extra to it.

So add in the taco packet and the 3/4 cup of water…

And stir it around for about 5 minutes. This is what it will look like after the water is all absorbed.

Now, having grown up with seasoning packets as one of the primary ingredients in many recipes, I would be more than happy to do as the packet instructs and “place in warm taco shell and enjoy”, but that is not why we’re here, as happy as I would be to stay.

So dump in a 16-ounce jar of salsa.

Reduce the heat. Stir it around.

Let this concoction sit for about 20 minutes, uncovered, so the salsa reduces a little bit and the liquid parts of it are gone. But now is not the time to go dilly dally! (Though I typically do approve of all forms of both dilly and dally, we know this.)

Here’s what you’re going to do in the meantime, other than stirring the mixture every so often, which you must do.

Break out your 9×13″ baking pan.

Lightly grease it.

Crumble up some tortilla chips in your 9×13″ pan. The recipe calls for 3 cups worth, but I’ve never been bothered to measure it out and just line the bottom of the pan.

Now this is important: grab a chip from the bag that you didn’t use….

And dip it into the ground beef concoction. Let it cool for a second and eat it.

Repeat.

Because it’s just that good.

What good is cooking if you’re not constantly “tasting,” right? So say it with me, it’s not snacking, it’s tasting.

In between tastings, preheat the oven to 350°.

So now it’s 20 minutes later, and here, ladies and gentlemen, is where you’re going to have to come on a wonderful imagination ride with me and pretend, with all your mights, that I followed the instructions and poured the drained can of chili beans into the beef mixture.

(I didn’t pour the drained can of chili beans into the beef mixture.)

In fact, I just plum forgot.

But do that step. Please, do that step. So, pretending that you’re not a flake like me and actually managed to heat through the beans into the beef mixture for a minute or so, spoon the beef mixture over chips.

Gently!

Gently!

Is that all you can say? Gently?

Gently!

(It’s the Princess Bride. Go watch the movie if you did not understand that interchange. Immediately.)

So now, with the beef and bean mixture on top of the chips, ladle over the 16-ounce jar of sour cream and smooth it out. You don’t have to be as gentle with this part.

And only then, if you’re me, realize you’ve forgotten the beans and heat them up really quickly in the pan….

…And put them on top of the sour cream.

So we’re still pretending the beans aren’t there, right? Right? Ok.

When I first made this recipe it was in the dead of winter during whatever tomato shortage of whatever year it was and fresh tomatoes cost about $5000 plus whichever finger you hadn’t already given up trying to buy whatever else was in shortage that year. So I improvised and bought a $0.79 can of Rotel.

I haven’t gone back since. The Rotel adds a little spice and green chillies that otherwise the dish was lacking. But please, if you feel inclined, do use fresh tomatoes. I am never one to discourage this activity.

So drain the can of Rotel (I used the hot variety, but feel free to use your personal favorite), and then spoon it over the (no-beans) sour cream.

And then cut up some green onions (scallions)…

And sprinkle them on top of the tomatoes.

(If you’re cooking this for my mom, don’t tell her these are in there. She’s very picky and won’t eat things with green onions in them. But if you don’t tell her, she won’t notice. It’s a little secret I have. That said, they do add deliciousness to the dish, so try to put them in.)

The recipe says to now use the black olives here, but I just think black olives are so-so, and thus I cut them out of the recipe. C’est la vie.

Then it’s time for the grand finale: the cheese. This dish would not be this dish without the cheese. It would be like watching Rudy all the way through to the end and then stopping right before the entire stadium starts cheering his name. No? Ok, then just trust me. It’s delicious.

So sprinkle on the cheese, and then some more cheese….

Until your casserole looks like this.

Put it in your 350° oven, uncovered, for 30 minutes.

Now is the time for dilly-dallying. So go! Dilly dally! Have fun! Watch Jeopardy. Pretend you’re as awesome as Ken Jennings. Fail miserably at this prospect. (Unless it’s Kids Week.)

When you take out the casserole, it should look like this.

Eat for dinner and lunch every day until it’s gone. The leftovers reheat wonderfully. I haven’t ever tried freezing it because, well, LSB and I like it so much that we have no problem eating it for days on end. But if you do try it, let me know how it goes!

And that’s it.

Here’s the full recipe again from AllRecipes, with my edits in italics.

P.S. Having the beans on top of the sour cream was still delicious! It didn’t really matter at all. Happy munching!

Ingredients

  • 1 pound lean ground beef
  • 2 cups salsa
  • 1 (16 ounce) can chili beans, drained
  • 3 cups tortilla chips, crushed (I just enough to layer the bottom of the pan)
  • 2 cups sour cream
  • 1 (2 ounce) can sliced black olives, drained (I don’t use these at all.)
  • 1/2 cup chopped green onion
  • 1/2 cup chopped fresh tomato (Or 1 can of Rotel)
  • 2 cups shredded Cheddar cheese

Directions

  1. Preheat oven to 350 degrees F (175 degrees C).
  2. In a large skillet over medium-high heat, cook ground beef until no longer pink. Stir in salsa, reduce heat, and simmer 20 minutes, or until liquid is absorbed. Stir in beans, and heat through.
  3. Spray a 9×13 baking dish with cooking spray. Spread crushed tortilla chips in dish, and then spoon beef mixture over chips. Spread sour cream over beef, and sprinkle olives, green onion, and tomato over the sour cream. Top with Cheddar cheese.
  4. Bake in preheated oven for 30 minutes, or until hot and bubbly.
Enjoy!

Buffalo Chicken Dip

Ladies and gentlemen, it is officially fall. Now, since I’m originally from Florida this news tends to make me weep with sadness knowing that my residence in the northern tundra of North Carolina will soon consist of 6 months of cold, rainy, miserable weather.

However, there is one fantastically amazing part of fall.

No, it’s not pumpkin spice lattes.

It’s certainly not the cooler weather. (Please see above re: Florida girl)

It’s football season.

Football in the South is more than a sport. It’s a gosh darned religion, and we’re proud of it. I’m lucky enough to live in the city of my alma mater and get to go to the tailgates almost every home game. And as such, I get to make tailgate food.

This time I decided to take a risk and make something that I have never made before: buffalo chicken dip.

Success cannot even begin to describe the popularity of this dish. I wanted to get a picture of it in progress being eaten, but it was gone almost the second I put it on the table. People, if you want to make friends and influence people I will tell you this: make. this. dip.

I found a recipe on The Bitten Word a little while back and have been looking for a reason to make it. If the first tailgate of the year isn’t a good reason, well, I just don’t know what is. This recipe baffled me a little bit with its mix of blue cheese and ranch. I had previously (incorrectly) been under the assumption that you are either a ranch person or a blue cheese person and there was no hope of crossover. It was one of life’s great debates of who you are as a person. Ranch or blue cheese. Chocolate or vanilla. Pulp or no pulp OJ. (LSB likes ranch, I like blue cheese. He likes no pulp in his OJ and I like mine nearly chewable. There was almost no hope for us until I found this recipe!)

“My theory is that when it comes to important subjects, there are only two ways a person can answer. Which way they choose, tells you who that person is. For instance, there are only two kinds of people in the world, Beatles people and Elvis people. Now Beatles people can like Elvis and Elvis people can like the Beatles, but nobody likes them both equally. Somewhere you have to make a choice. And that choice tells you who you are.”

Name that movie.

It’s Pulp Fiction. I have no patience.

Side note on the side note: I’m a Beatles person.

Anyhow, let’s move on. Here’s the cast of characters: Texas Pete buffalo sauce (a good ‘ol NC choice every time) , ranch dressing, blue cheese dressing, blue cheese crumbles, a block of cream cheese, and, even though the recipe calls for 2 cups of shredded rotisserie chicken, Harris Teeter was out of rotisserie chicken, I was forced to use 2 12.5-ounce cans of chicken instead. (Pictured is only 1 can, but please use your imaginations.)

Publix wouldn’t have been out.

I miss Publix.

This recipe is embarrassingly another one of what I like to call “plop” recipes, where there’s no real work involved other than “plopping” the ingredients together and stirring them up. You can even just mix it all up in the baking dish you’re going to use to bake it! Genius.

(Preheat your oven to 350°.)

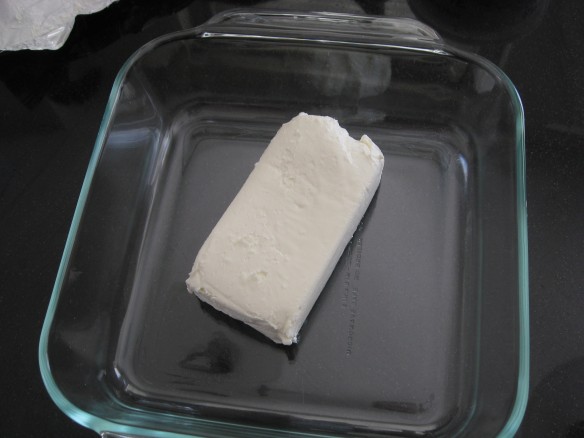
First the cream cheese.

Plop.

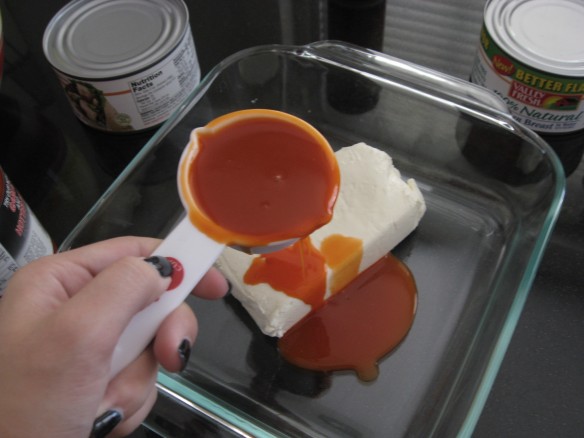
Then the buffalo sauce.

Plop.

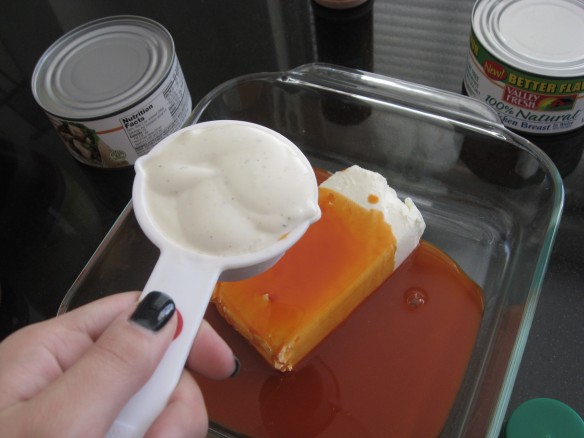
Then the ranch dressing…

And the blue cheese dressing…

Plop, plop.

(I’m still amazed these two are mixing and the apocolypse hasn’t occurred…)

And the blue cheese crumbles…

Oh my.

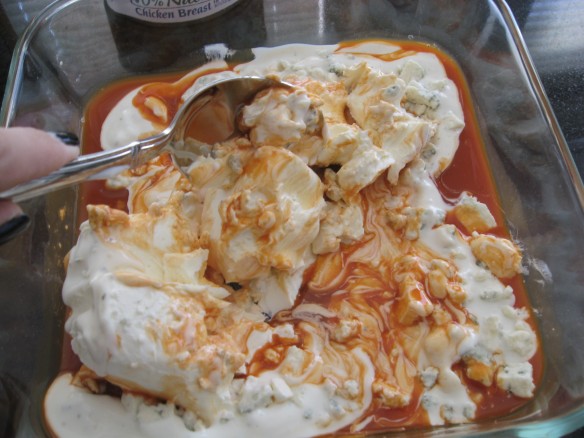
Then mix it up and be surprised at the salmon color it turns.


Oooohhh, swirly…

Then drain your can of chicken and plop it on in.

Here’s something I learned: one drained 12.5-ounce can of shredded chicken is exactly 1 cup of chicken.

Plop in the 2nd can, this time without a measuring cup due to your recent discovery.

Mix it in and plop it in the oven, uncovered, for about 25 minutes.

Just kidding, don’t plop it in the oven. Place it. There’s no reason to messy up your oven just because I got plop-happy. I’m done now.

Now it’s 25 minutes later, and the dip is READY.

It might not look like much, and you may know how little effort it took, but holy cow. Nobody else will care. They’ll be too busy cramming their faces with buffalo chicken dip to even consider caring.

Serve with scoopy tortilla chips.

So there you have it! An instant hit that takes almost no effort at all.

Happy tailgating! Here’s the original recipe from The Bitten Word again:

Buffalo Chicken Dip As Made by The Bitten Word
Adapted from Frank’s RedHot

INGREDIENTS

8 ounce package of cream cheese, softened
1/4 cup ranch salad dressing
1/4 cup blue cheese salad dressing
1/2 cup buffalo sauce or buffalo style barbecue sauce
1/2 cup crumbled blue cheese (shredded mozzarella cheese can be substituted)
2 cups shredded meat from a fully cooked rotisserie chicken (I used 2 12.5-ounce cans of chicken, and it was still good.)

DIRECTIONS

Pre-heat oven to 350 degrees F.  In a deep baking dish, mix cream cheese, salad dress, buffalo sauce, and cheese.  Stir until combined.  Stir in chicken.

Bake uncovered for 20-25 minutes, until the dish is heated through.  Serve with crackers, pita chips, sliced bread or vegetables.

NOTE:  Depending on your tastes and the ingredients on hand, you can use 1/2 cup ranch or blue cheese salad rather than 1/4 cup of each.  Similarly, you can mix blue cheese and mozzarella, or use portions of each.

Baked Brie

Last night my friend Gretchen came over. Now here’s the thing about Gretchen: she’s awesome. She brought wine (I wasn’t lying about the awesome thing) and so I wanted to make something that fit not only for a girls’ night, but also fit well with wine. Times like these scream for tried and true deliciousness.

A recipe where everyone who eats it goes, “oh my GOSH, how is this SO GOOD?”

A recipe that take about 2 minutes–tops–of actual work.

Did I say that?

It’s not that Gretchen isn’t worth more work–she totally is–it’s just that more work just doesn’t produce significantly better results.

I got a basic baked brie recipe from AllRecipes a long time ago and it has yet to fail me. Ever. Its unfailingness continued last night.

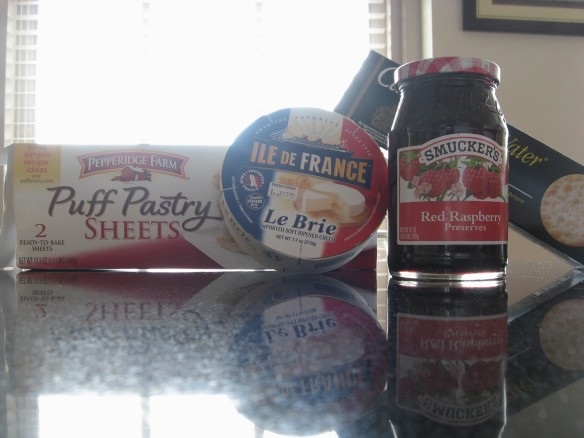
First, the cast of characters: 1 puff pastry sheet (found in any grocer’s freezer, we’re going for easy-peasy here, remember?), raspberry preserves (the recipe calls for jam, but I find preserves more delicious. Plus, raspberry preserves are my absolute favorite), 8 oz. of brie (is Brie the cheese exclusively served in Heaven? I truly believe it might be so), and water crackers (as a conveyance for the simple deliciousness straight into the face).

That’s it.

That’s it?

Oh no wait, the recipe calls for chopped walnuts, which I thought I had in my pantry, but didn’t. Did I panic? No, I realized that nobody ever notices the walnuts anyhow and they’re kind of a waste of money. Life went on.

So yes, that’s it.

The first step is really tough: take a puff pastry sheet out of the packaging and put it on a plate to thaw.

Wait for about 20-30 minutes. Do other things. Vacuum your floor if you realize that Gretchen might run away screaming because she thinks you’re secretly harboring a yeti in your house instead of a border collie due to all the hair on the floor. Make your bed, too, while you’re at it. Or, since you’re probably more organized than I am and have already done this by this time in the day, go do fun things like play a few quizzes on Sporcle.

(And preheat your oven to 350°.)

Now it’s 20-30 minutes later, your floors are vacuumed, your dog is huddling in a corner whimpering because he hates the vacuum, your bed is made, and, most importantly, your puff pastry is thawed!

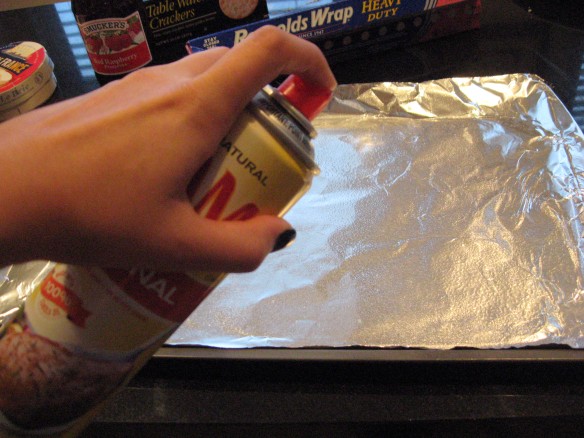
Lightly grease your foil-lined baking sheet…

Unfold the thawed puff pastry sheet out on the sheet and place the 8-oz. brie wheel in the middle of it.

Now, put 1/3 cup of raspberry preserves (or jam if you want to follow the recipe) on top of the brie.

Ohmygoodnessgracious.

So here’s where the, um, complicated (?) part comes in. Fold the corners into the center of the brie to enclose the cheese in the puff pastry. Some people are really really creative with this part and can make these look like works of art.

I am not some people.

So here’s what mine looks like.

1 corner…

I like to fold the insides of the corners in to make it look a little neater, but really I’m sure you creative people can make better designs with this extra fabric.

Here’s 3 corners in…

(Ladies. Side note here. I invested in a shellac manicure because I heard they last a long time and they do. Not only is it impossible to smudge the second you walk out of the salon, but this is a week later and still no smudges or chips. Woo hoo!)

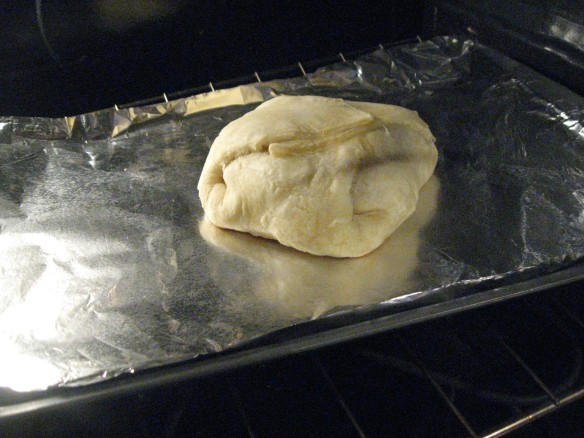
Ok. Back to business: here’s what it looks like assembled.

Now the recipe says to bake it in your 350° oven for 20 minutes or so, until it’s golden. However, I have found that 20 minutes is NEVER enough.

Here’s what mine looked like at 20 minutes.

That’s not nearly golden enough!

I put it in for 4 more minutes.

And then 4 more minutes again.

And again. And again.

So really it ended up being around 30-35 minutes when it was perfectly golden-brown. And ready to serve.

I said it once and I’ll say it again.

Ohmygoodnessgracious.

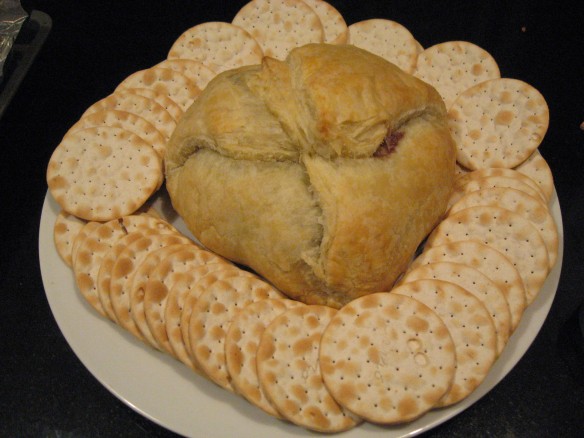
Here it is with water crackers, ready for Gretchen and I to devour it.

And devour we did!

Here’s the recipe again (unmodified), from AllRecipes.

Ingredients

  • 1 sheet frozen puff pastry, thawed
  • 1 (8 ounce) round Brie cheese
  • 1/3 cup seedless raspberry jam
  • 2 tablespoons chopped walnuts

Directions

  1. Preheat oven to 350 degrees F (175 degrees C). Line a baking sheet with aluminum foil and lightly grease with cooking spray.
  2. Lay the puff pastry onto the prepared baking sheet. Center the Brie wheel onto the pastry. Spread the jam evenly over the top of the Brie. Sprinkle the walnuts atop the jam. Fold the puff pastry over the top of the Brie, sealing all openings.
  3. Bake in preheated oven until the pastry is golden brown, about 20 minutes.

Welcome!

Hello! And welcome! So glad you could join me.

Now normally here is where I would have a thoughtfully planned-out post with lots of pictures detailing everything I made last night. And if it was worthwhile.

Unfortunately, that’s just not in the cards today. I made and ate all my chili without knowing the next day that I would be creating a blog about such delights.

In case you were wondering, though, it was delightful.

Oh, you weren’t wondering? All right then. Let’s move on.

I do, however, promise with all my heart that the next thing I make not only will I document, I will post with fervor.

Fervor, I say!

Fervor.

But do stay tuned! And thanks for visiting! See you soon.